<Part 2> Make spinning 3D shapes in SDL2 and OpenGL
Set up a Mesh class and shaders to render a "square"
Last part, we successfully created a window in SDL2 using OpenGL. Now that we understand how that works, we're going to learn how to render things on the screen by building a mesh class and creating shaders in GLSL, a shader programming language.
DISCLAIMER: This walkthrough assumes knowledge from Part 1 and a working knowledge of C++ and how to compile it.
GitHub Repo: https://github.com/HadiCya/spinning_shapes
YouTube Version:
Creating our Mesh class
To start us off, we’re going to need to create a Mesh class for us to create Mesh objects, as eventually we’re going to make this 3D.
Go ahead and create a mesh.h header file:
#ifndef MESH_H
#define MESH_H

#include <glad/glad.h>

class Mesh {
    public:
        Mesh();
        void draw();
    private:
        GLuint VertexArrayID, vertexbuffer, elementbuffer, vertex_size;
};

#endif
We will construct a class called Mesh, which will set us up with the mesh information such as the vertices and what order to draw them in, along with setting up the vertices and triangle points.
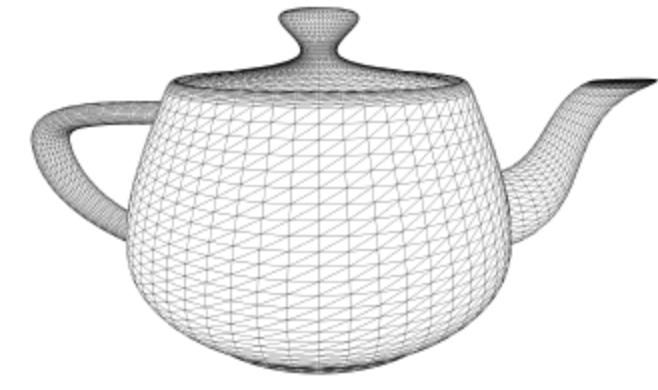
Before we write code, let's take a deep dive into understanding how drawing vertices on the screen works. In computer graphics, a polygon mesh is used to render by drawing triangles. If you see an advanced character in a movie or video game, they are made up of thousands of tiny triangles. Triangles are used because of their ease of manipulation and require less storage, something that becomes important as projects grow in size and complexity.
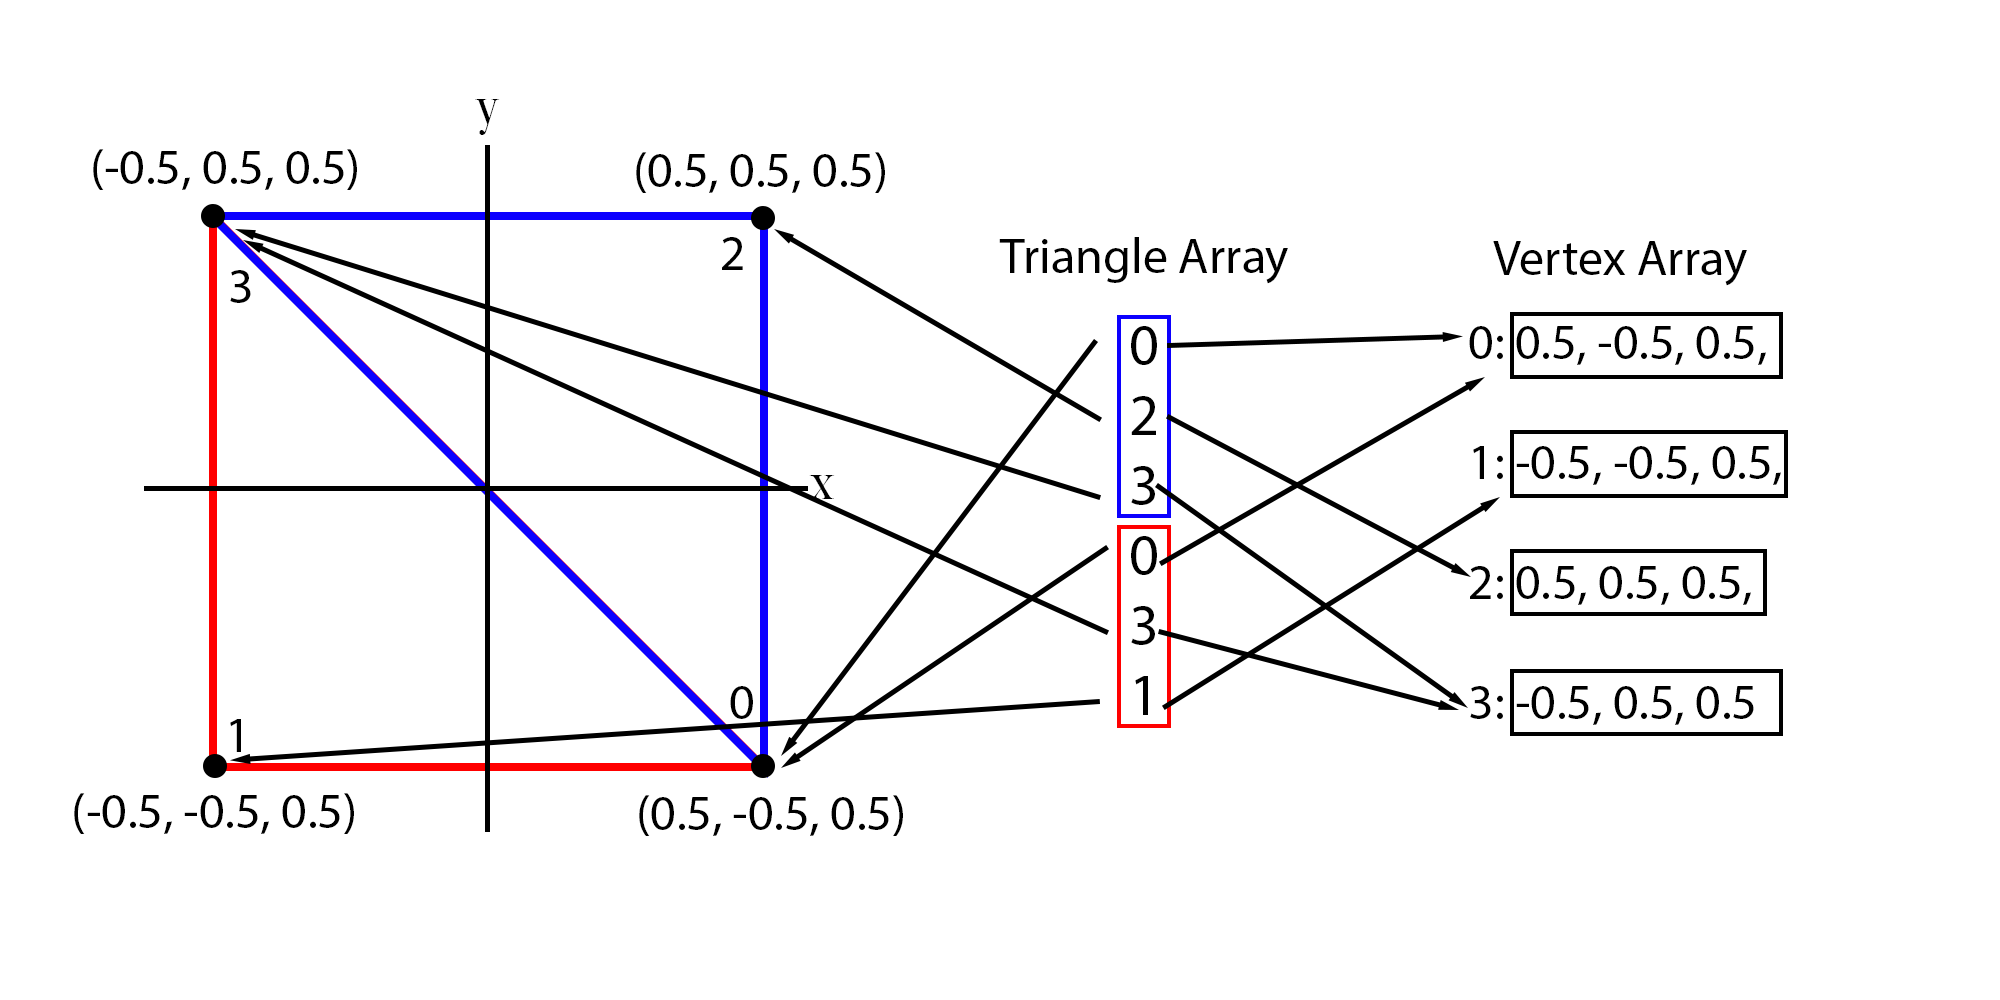
The way a polygon mesh stores its data is by utilizing a triangle and vertex array. The triangle array is responsible for storing which vertices to access in the vertex array. For example, if we have the triangle array [0, 2, 3, 0, 3, 1] the first triangle we draw accesses the vertices at positions 0, 2, 3 and then connecting them on the screen, creating a triangle.
In OpenGL, we manage this data with buffers, which are responsible for storing triangle and vertex data to be drawn on the screen.
Let's create our mesh.cpp file, and we'll see how we can implement this, and how it all works.
#include <vector>
#include "mesh.h"
#include <SDL.h>
#include <iostream>

Mesh::Mesh() {
    glGenVertexArrays(1, &VertexArrayID);
    glBindVertexArray(VertexArrayID);

    GLfloat vertices[] = {
        0.5f, -0.5f, 0.5f,
        -0.5f, -0.5f, 0.5f,
        0.5f, 0.5f, 0.5f,
        -0.5f, 0.5f, 0.5f
    };

    GLint triangles[] = {0, 2, 3, 0, 3, 1};

    glGenBuffers(1, &vertexbuffer);
    glBindBuffer(GL_ARRAY_BUFFER, vertexbuffer);
    glBufferData(GL_ARRAY_BUFFER, sizeof(vertices), vertices, GL_STATIC_DRAW);

    glGenBuffers(1, &elementbuffer);
    glBindBuffer(GL_ELEMENT_ARRAY_BUFFER, elementbuffer);
    glBufferData(GL_ELEMENT_ARRAY_BUFFER, sizeof(triangles), triangles, GL_STATIC_DRAW);

    vertex_size = sizeof(triangles) / sizeof(GLint);
}
glGenVertexArrays(1, &VertexArrayID) and glBindVertexArray(VertexArrayID) creates and binds a vertex array object and its ID so that subsequent vertex buffer operations can be stored in the new object.
We then define our vertices and triangles arrays, like we did earlier in the diagram.
Now, we have to generate buffers to store our data.
The vertex buffer is a mechanism that sends the vertex data to the GPU, we are:
Generating a unique ID for the buffer.
Binding the buffer, setting it as active for OpenGL to operate with.
Allocating the appropriate amount of memory, and copying the data to the GPU.
GL_STATIC_DRAWspecifies that we are giving it the same unchanging data, that will be drawn many times.
The element buffer, also known as an index buffer, sends the triangle index data to the GPU.
This series of calls does the same as for the vertex buffer but for the index data. GL_ELEMENT_ARRAY_BUFFER tells OpenGL that this buffer contains index data.
Lastly, we'll store vertex_size data for when we call the draw() function.
Now, we need to make our draw() function:
void Mesh::draw(){
    glEnableVertexAttribArray(0);
    glBindBuffer(GL_ARRAY_BUFFER, vertexbuffer);
    glVertexAttribPointer(0, 3, GL_FLOAT, GL_FALSE, 0, (void*)0);

    glBindBuffer(GL_ELEMENT_ARRAY_BUFFER, elementbuffer);
    glDrawElements(GL_TRIANGLES, vertex_size, GL_UNSIGNED_INT, 0);

    glDisableVertexAttribArray(0);
}
Let's go through this function line by line:
glEnableVertexAttribArray(0): Enable the first attribute array at position 0. We're simply allowing ourselves to start the drawing process.glBindBuffer(GL_ARRAY_BUFFER, vertexbuffer): Bind the vertex buffer.glVertexAttribPointer(0, 3, GL_FLOAT, GL_FALSE, 0, (void*)0): Describe how the data for the vertices is stored in the vertex buffer.Index: 0is telling the vertex shader (which we will touch on more), to get its vertex data from the vertex attribute at position 0.Size: 3represents how many vertices we go through to make up 1 point. We want every 3 floats in the vertices array to represent one vertex, such that it representsx, y, z(3D Coordinate).Type: GL_FLOATis the type of data we are using.Normalized: GL_FALSEspecifies that fixed-point data values are accessed directly, instead of being normalized.Stride: 0specifies the distance between data in our buffer. Since we are only storing vertex information back-to-back, this is 0. If we were to, for example, store RGB values after every vertex, we would set this to6 * sizeof(float)Pointer: (void*)0stores the pointer to where the attribute starts, and in our case, is 0.
glBindBuffer(GL_ELEMENT_ARRAY_BUFFER, elementbuffer): Bind the element buffer.glDrawElements(GL_TRIANGLES, vertex_size, GL_UNSIGNED_INT, 0): Draw the triangles using the vertex and element buffers, according to the total size.glDisableVertexAttribArray(0): Disable the first attribute array after drawing.
Writing our shaders
Before we can start drawing things on the screen, OpenGL requires us to have at minimum a fragment and vertex shader. We're going to be making these in the Graphics Library Shader Language (GLSL) which is a shader language based on the C programming language. Shaders aren't our primary focus for this series, so we're going to be covering the basics.
First, we’ll create a file called vertex.glsl to store our Vertex Shader:
#version 330 core

layout (location = 0) in vec3 aPos;

void main() {
    gl_Position = vec4(aPos, 1.0);
}
The vertex shader is responsible for telling the GPU where every point is to be drawn, by transforming its position and other attributes using mathematic calculations. In this case, we're not going to be doing much.
#version 330 core: This sets the GLSL version to 3.30 and specifies the core profile. (In the last part we talked about using core over compatibility)layout (location = 0) in vec3 aPos: This declares a 3-component vector input variableaPos, which represents the position of the vertex. Thelayout (location = 0)part explicitly sets the location of this attribute to 0.void main() { ... }: The main function of the shader. It's executed once for every vertex.gl_Position = vec4(aPos, 1.0): This converts the input 3D position into a 4D vector by adding a fourth component with a value of 1.0. This is common in graphics to represent homogeneous coordinates.
Now we want to create a file called fragment.glsl for our Fragment Shader
#version 330 core

out vec3 color;

void main() {
    color = vec3(1,1,1);
}
The fragment shader is responsible for telling the GPU what color information needs to be drawn, for every pixel that our geometry covers. This will also be simple, especially since later we will just be using the wireframe setting.
out vec3 color: This declares a 3-component vector output variablecolor, which will store the output color of the fragment.void main() { ... }: The main function of the shader, executed once for every fragment (potential pixel on the screen).color = vec3(1,1,1): This sets the output color to white (1,1,1), meaning every fragment processed by this shader will have this color.
We’re also going to use an existing shader loader and header. This isn’t necessary to understand OpenGL completely, go ahead and just copy the code directly.
Create the file loadShader.h and populate it with this code:
#ifndef LOAD_SHADER_H
#define LOAD_SHADER_H

#include <glad/glad.h>

GLuint LoadShaders(const char * vertex_file_path, const char * fragment_file_path);

#endif // LOAD_SHADER_H
Create the file loadShader.cpp and populate it with this code:
#include "loadShader.h"
#include <SDL.h>
#include <fstream>
#include <sstream>
#include <iostream>

GLuint LoadShaders(const char * vertex_file_path,const char * fragment_file_path){

 // Create the shaders
 GLuint VertexShaderID = glCreateShader(GL_VERTEX_SHADER);
 GLuint FragmentShaderID = glCreateShader(GL_FRAGMENT_SHADER);

 // Read the Vertex Shader code from the file
 std::string VertexShaderCode;
 std::ifstream VertexShaderStream(vertex_file_path, std::ios::in);
 if(VertexShaderStream.is_open()){
  std::stringstream sstr;
  sstr << VertexShaderStream.rdbuf();
  VertexShaderCode = sstr.str();
  VertexShaderStream.close();
 }else{
  printf("Impossible to open %s. Are you in the right directory ? Don't forget to read the FAQ !\n", vertex_file_path);
  getchar();
  return 0;
 }

 // Read the Fragment Shader code from the file
 std::string FragmentShaderCode;
 std::ifstream FragmentShaderStream(fragment_file_path, std::ios::in);
 if(FragmentShaderStream.is_open()){
  std::stringstream sstr;
  sstr << FragmentShaderStream.rdbuf();
  FragmentShaderCode = sstr.str();
  FragmentShaderStream.close();
 }

 GLint Result = GL_FALSE;
 int InfoLogLength;

 // Compile Vertex Shader
 printf("Compiling shader : %s\n", vertex_file_path);
 char const * VertexSourcePointer = VertexShaderCode.c_str();
 glShaderSource(VertexShaderID, 1, &VertexSourcePointer , NULL);
 glCompileShader(VertexShaderID);

 // Check Vertex Shader
 glGetShaderiv(VertexShaderID, GL_COMPILE_STATUS, &Result);
 glGetShaderiv(VertexShaderID, GL_INFO_LOG_LENGTH, &InfoLogLength);
 if ( InfoLogLength > 0 ){
  std::vector<char> VertexShaderErrorMessage(InfoLogLength+1);
  glGetShaderInfoLog(VertexShaderID, InfoLogLength, NULL, &VertexShaderErrorMessage[0]);
  printf("%s\n", &VertexShaderErrorMessage[0]);
 }

 // Compile Fragment Shader
 printf("Compiling shader : %s\n", fragment_file_path);
 char const * FragmentSourcePointer = FragmentShaderCode.c_str();
 glShaderSource(FragmentShaderID, 1, &FragmentSourcePointer , NULL);
 glCompileShader(FragmentShaderID);

 // Check Fragment Shader
 glGetShaderiv(FragmentShaderID, GL_COMPILE_STATUS, &Result);
 glGetShaderiv(FragmentShaderID, GL_INFO_LOG_LENGTH, &InfoLogLength);
 if ( InfoLogLength > 0 ){
  std::vector<char> FragmentShaderErrorMessage(InfoLogLength+1);
  glGetShaderInfoLog(FragmentShaderID, InfoLogLength, NULL, &FragmentShaderErrorMessage[0]);
  printf("%s\n", &FragmentShaderErrorMessage[0]);
 }

 // Link the program
 printf("Linking program\n");
 GLuint ProgramID = glCreateProgram();
 glAttachShader(ProgramID, VertexShaderID);
 glAttachShader(ProgramID, FragmentShaderID);
 glLinkProgram(ProgramID);

 // Check the program
 glGetProgramiv(ProgramID, GL_LINK_STATUS, &Result);
 glGetProgramiv(ProgramID, GL_INFO_LOG_LENGTH, &InfoLogLength);
 if ( InfoLogLength > 0 ){
  std::vector<char> ProgramErrorMessage(InfoLogLength+1);
  glGetProgramInfoLog(ProgramID, InfoLogLength, NULL, &ProgramErrorMessage[0]);
  printf("%s\n", &ProgramErrorMessage[0]);
 }

 glDetachShader(ProgramID, VertexShaderID);
 glDetachShader(ProgramID, FragmentShaderID);

 glDeleteShader(VertexShaderID);
 glDeleteShader(FragmentShaderID);

 return ProgramID;
}
Credit to: https://www.opengl-tutorial.org/ for creating the shaders loader.
Making it all work
Now that we have our Mesh class completed, and our shaders set up, all we have to do now is make it work in our main.cpp
Let’s update our includes in main.cpp to:
#include <iostream>
#include <SDL.h>
#include "mesh.h"
#include "loadShader.h"
After we call gladLoadGLLoader(SDL_GL_GetProcAddress) we’re going to want to initialize our Mesh and load our shaders:
    SDL_GLContext context;
    context = SDL_GL_CreateContext(window);

    gladLoadGLLoader(SDL_GL_GetProcAddress);

    Mesh cube;

    GLuint programID = LoadShaders("vertex.glsl", "fragment.glsl");

    bool done = false;
Lastly, in our while loop, we’re going to want to actually draw our Mesh but not before we tell OpenGL to use the shaders we loaded earlier into programID
We’re also going to call glPolygonMode(GL_FRONT_AND_BACK, GL_LINE) which is going to render everything on the screen in wireframe mode. This is going to show how the triangles are being drawn, as we described earlier. And also, wireframe looks cool.
    while(!done) {
        glViewport(0, 0, screen_width, screen_height);

        SDL_Event event;
        while(SDL_PollEvent(&event)){
            if(event.type == SDL_QUIT) {
                done = true;
            }
        }
        glClear(GL_DEPTH_BUFFER_BIT | GL_COLOR_BUFFER_BIT);

        glUseProgram(programID);
        glPolygonMode(GL_FRONT_AND_BACK, GL_LINE);

        cube.draw();

        SDL_GL_SwapWindow(window);
That’s all the changes we need! Go ahead and compile your code yet again, this time adding mesh.cpp and loadShaders.cpp to your compilation list. This is how my compilation command looks now:
clang++ -std=c++20 main.cpp mesh.cpp loadShader.cpp ./glad/src/glad.c -o spinning_shapes -I/Library/Frameworks/SDL2.framework/Headers -I./glad/include -F/Library/Frameworks -framework SDL2
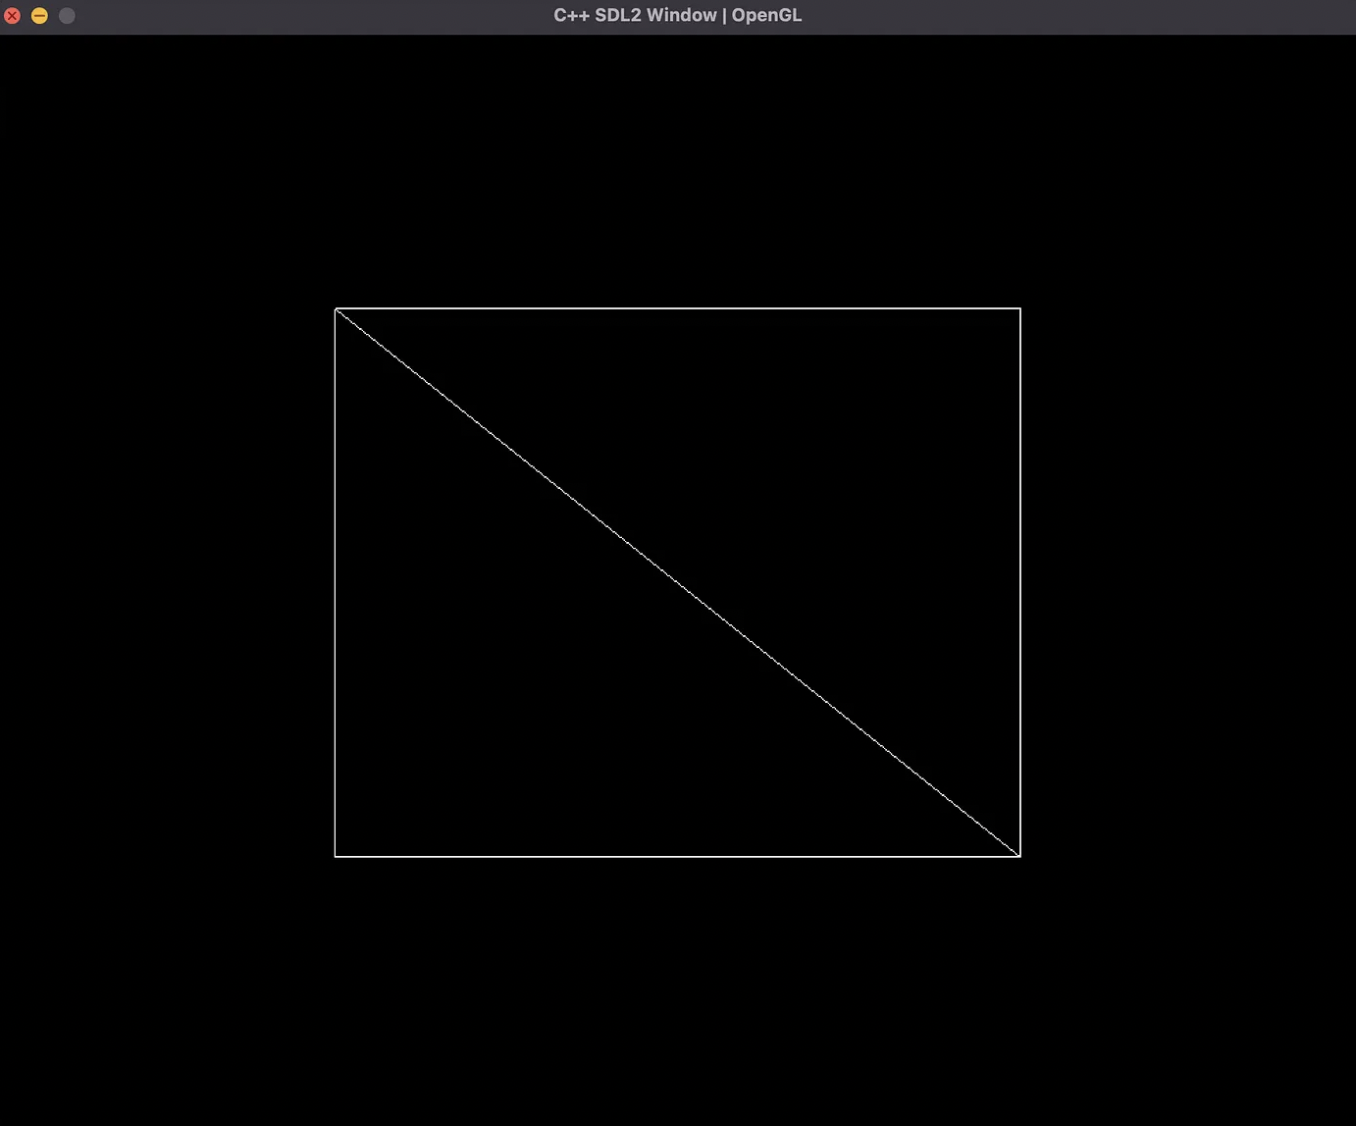
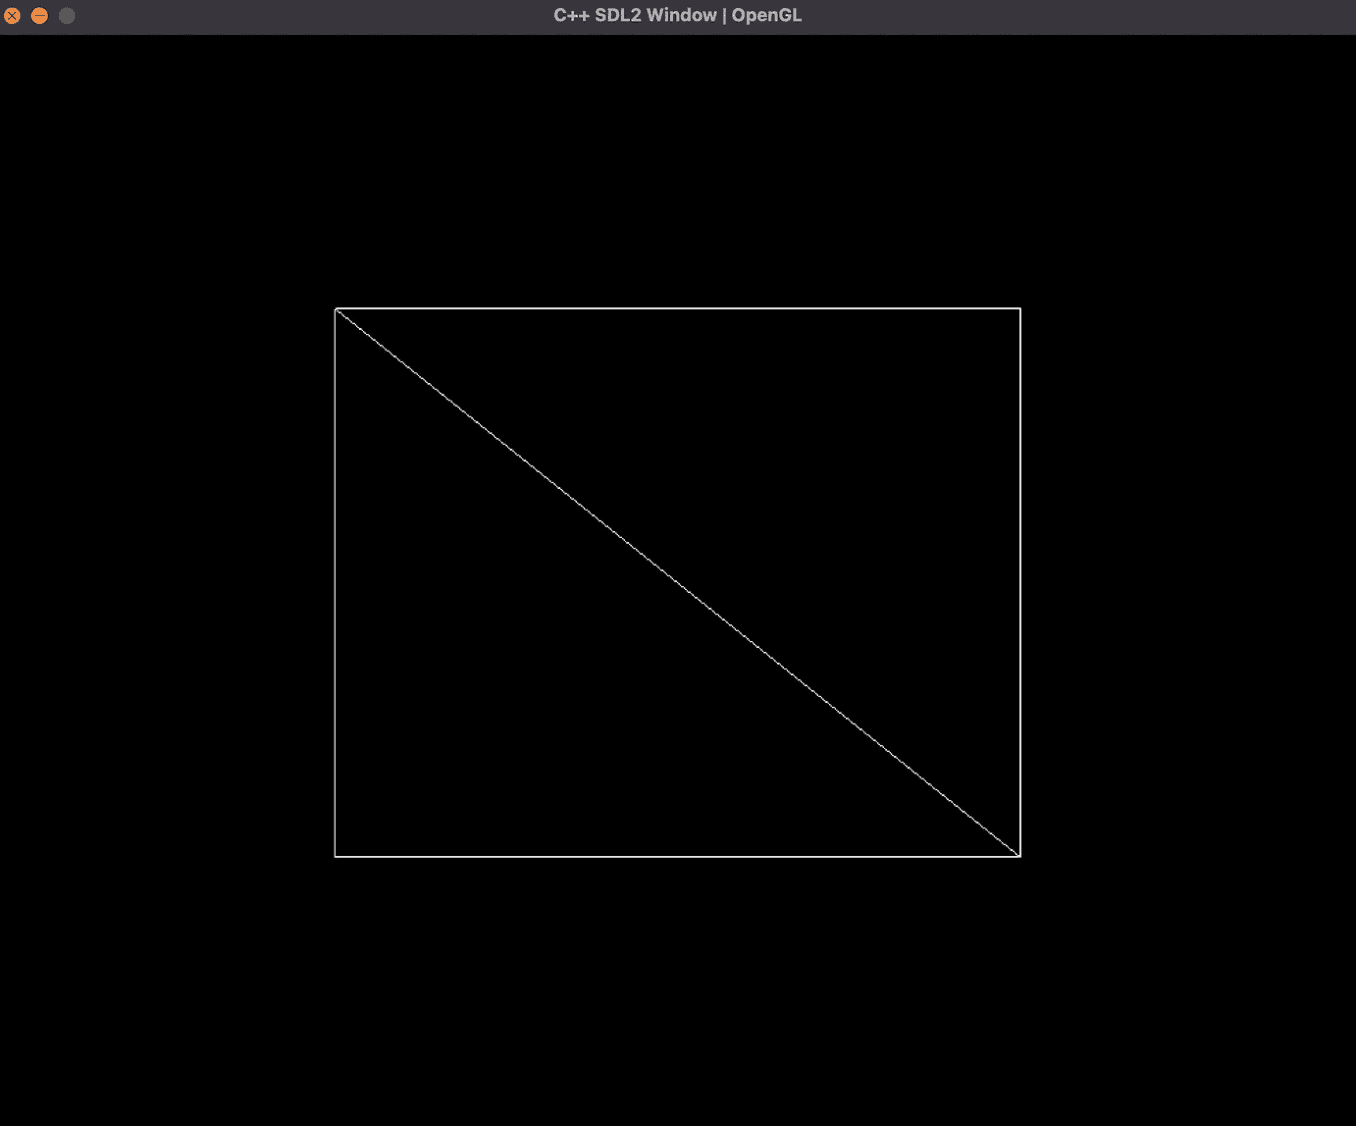
If you see a slightly stretched-out square, congrats! You’ve successfully rendered a “square” onto the screen.
You might be asking if our vertices are uniform, why is it stretched like that?
That, and how we're going to make this a spinning cube, will be answered in our next and final part!
Thanks for reading!